Photography Tips for Enlisting your Place for Film Shoots
Good quality photographs of your place is important when you are renting your House or any Property for Film Shoots. This increase the chances of Filmmakers selecting your place for their Films. This page is a quick guide on photographing your place the right way, for it to be enlisted on Filmapia.
To start with, keep in mind that Filmmakers want to get an idea of
- The general look of the place - both interiors and exteriors
- The space available for shoot and the space available for moving around, camera and light setups, etc.
- The sources of light (windows, doors, bulbs, lamps, etc.)
- Any special highlights of the Place (e.g. a Pool, high ceilings, etc.)
So the photos that you take must consider these points.
Interiors
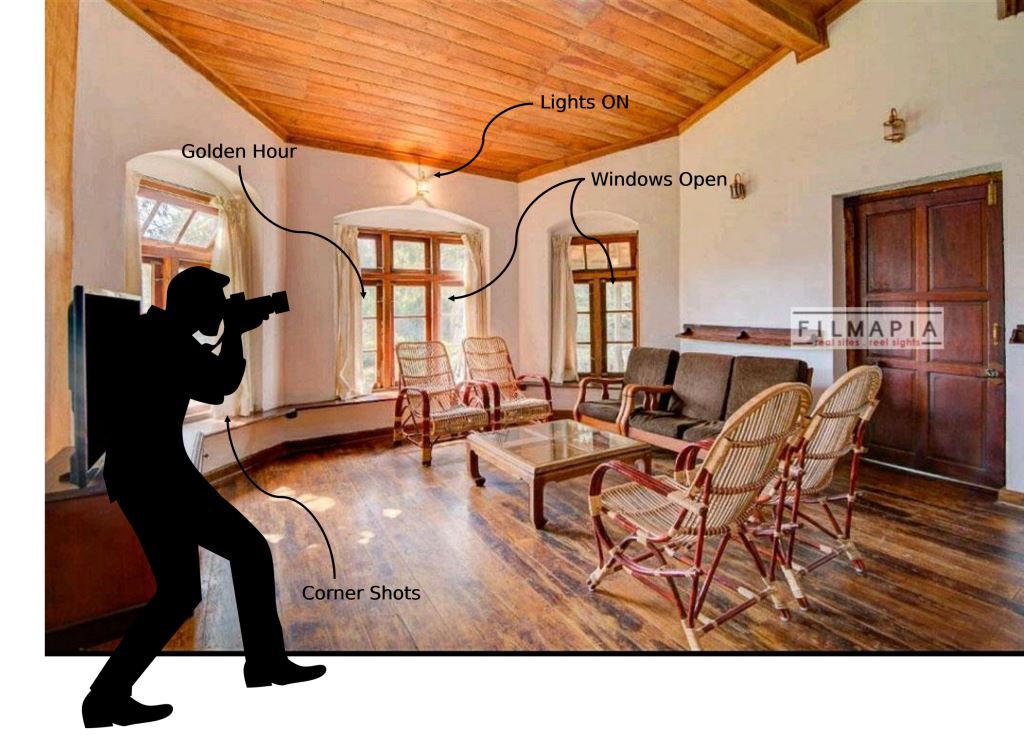
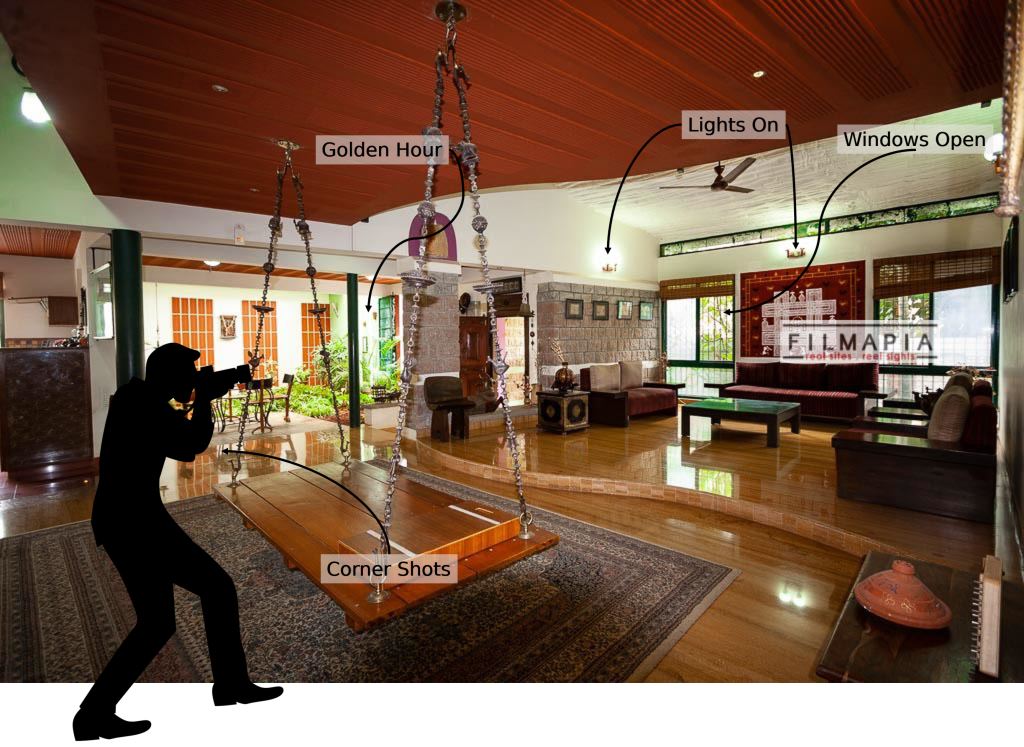
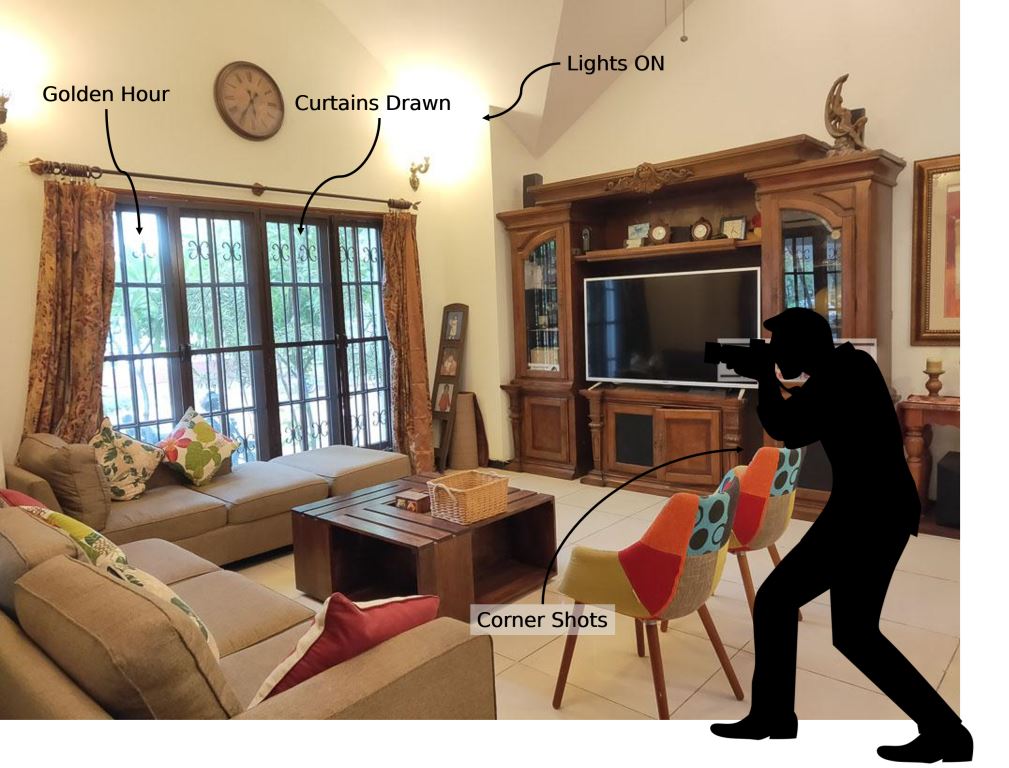
- Take photos during the day: Take photographs when there's ample natural light flowing into the Property. Preferably in the Golden hour (within 1-2 hours - after sunrise or before sunset, with ample sunlight flowing into the room)
- Let there be Lights!: Adjust the curtains/blinds to let in ample light into the room. Switch on all lights to ensure the room is well lit, especially in the corners.
- Clean up: Ensure the place is kept clean and clear of any clutter and extra items. Arrange furniture, or decorative items to enhance the look of the place. But be sure to not have these objects occupy most of the picture.
- Of course, clean up and set up the place depending on the type of place.
- Horizontal photos: Hold the phone/camera in a horizontal (landscape) position for taking the photos. Avoid taking photos at angles.
- On occasions, e.g. to capture the height of certain portions, it might be okay to take vertical (portrait) photos.
- 4-10 photos of every room/space: Include 4-8 photos of every room/space you have. The minimum 4 being the 4 corners of a room (typically). Take more than 4 if required, e.g. front/center shots, from a height, etc. Do not have have more than 8 photos of a room/space on the property.
- From the Corners: Shoot from all different corners of the room/space instead of taking center shots. This helps give a good understanding of the space available in the room. Hold the camera at your head height.
- You can of course take photos from the center/front. Sometimes they make sense and capture a better view of the place.
- Take as many photos of a space from different angles if required, but ensure that the corner shots are always included.
- Capture space: For all photos, the idea is to get a sense of space available inside the Property, more than the individual objects like furniture, art pieces, etc.
- Capture all rooms: Take photos of all the different rooms, areas available on the Property and are open for shoots.
- Photograph the washrooms/toilets: These are needed sometimes for the shoots, as well as for the crew to use as required. If the toilets are outside the Property, take photos of the access path to the toilets.
- Steady Photos: Shaken/hazy photos won't be accepted. Try and use a tripod, with camera triggers to avoid shaking of the camera, if possible. Else try your best to keep the camera steady.
NOTE
- Take multiple (4-10) photos from as many angles you want, but definitely include corner shots.
- Take photos of different rooms/spaces on the property.
- Here are links to some properties with the right set of photographs
- If you want to enlist your Property on Filmapia for Film Shoots, well... or !
Exteriors
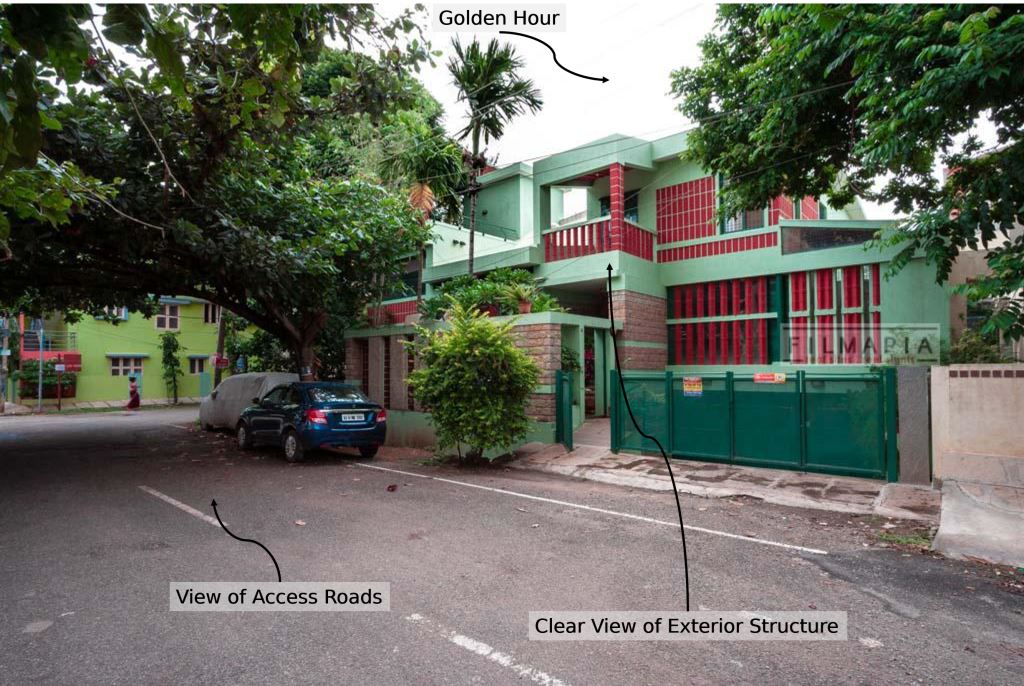
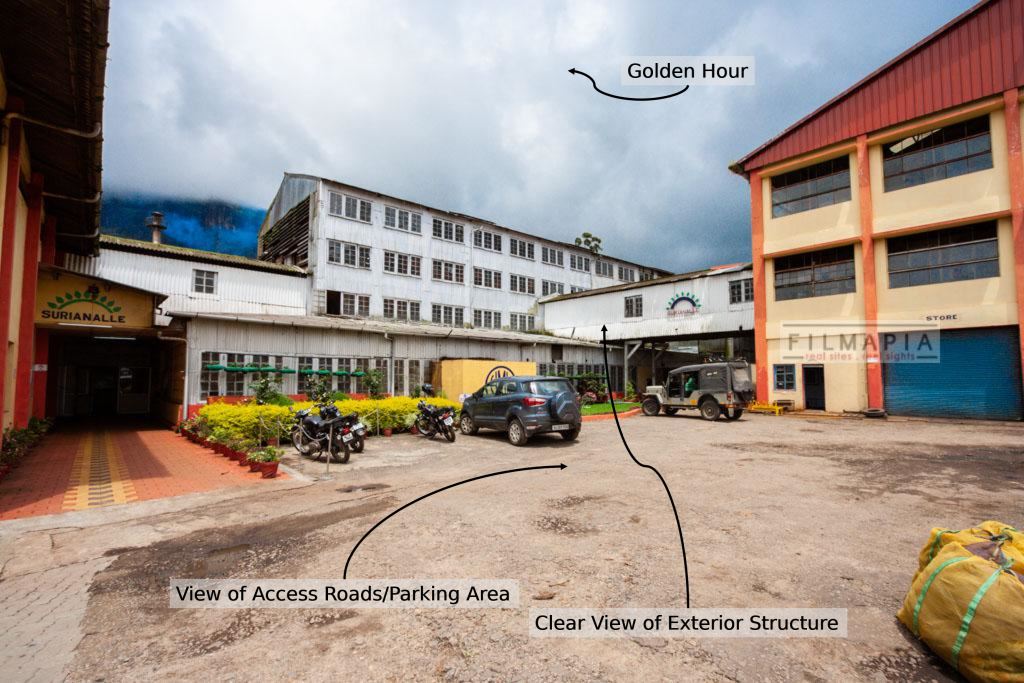
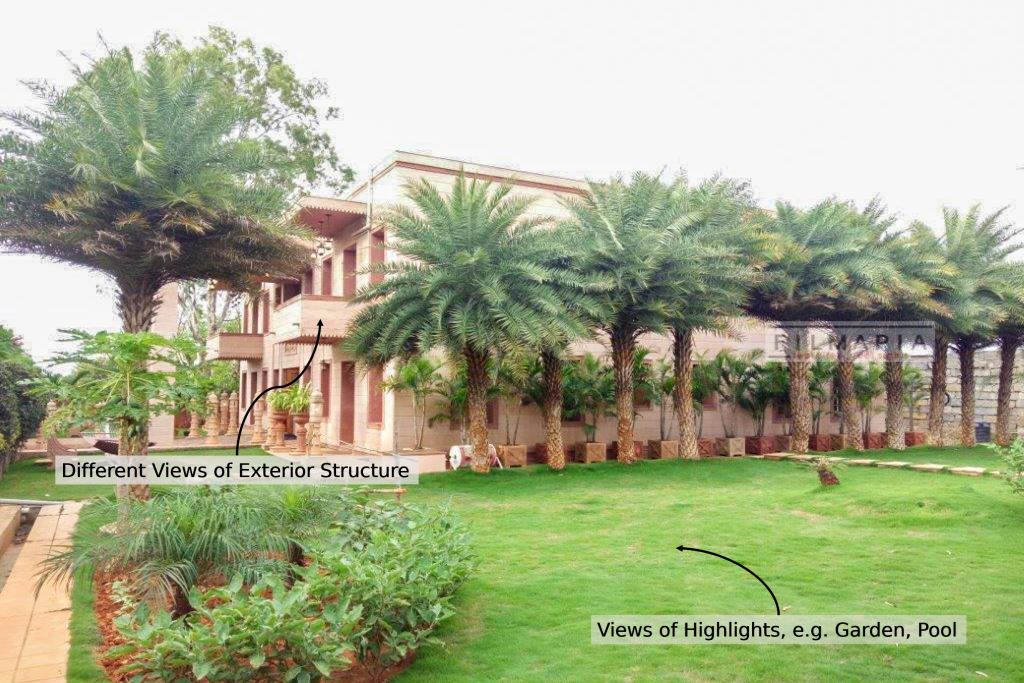
- Maximum view of the Property: Have the clear views to the exterior - no blocks like trees, huge trucks obstructing the view of the Property. Try and capture as much of the exterior structure as possible, including lawns, or any other areas available within the Property.
- It always might not be possible to get clear shots, e.g. if you have huge trees around - take shots from spots where the Property is visible the maximum.
- Take photos during the day: Take photographs when there's ample natural light available. Preferably in the Golden hour (within 1-2 hours - after sunrise or before sunset)
- Horizontal photos: Hold the phone/camera in a horizontal (landscape) position for taking the photos. Avoid taking photos at angles.
- On occasions, e.g. to capture the height of certain portions, it might be okay to take vertical (portrait) photos.
- 2-8 photos of the Property: There should be at least 2 photos of the exterior of the Property for Filmmakers to understand the exterior look, access paths, etc.
- Surroundings: Take photos of access roads, open areas in the immediate surrounding areas (which could potentially be used for Parking, if required).
- If the Property is (like) an apartment, do take photos of the space in front of the apartment - with the apartment door visible, slightly open. Take a photo of the outside space from inside the apartment as well.
- All sides of the Property: Take photos side photos as well as full frontal view photos. Don't take up close photos of parts of the exterior unless it's something that is very unique to your Place.
- Highlights of the Property: Take photos from various corners of highlight areas on the Property, e.g. pool, gardens, gazebos, etc. Refer point 5 above as well, for these.
- Here are links to some properties with the right set of photographs
- If you want to enlist your Property on Filmapia for Film Shoots, well... or !
More Reads
If this has intrigued you, read on for more related items:
- Home Is Where The Treasure Is!
- Points to remember for Film Shoots at your Property
- Your Property for Film Shoots